DIY thread

Need advice on recreational gear configurations? Look no further than this equipment forum.
User avatar
Nwbrewer
I've Got Gills
Posts: 4624
Joined: Fri Jul 21, 2006 10:59 am

TIZIP!

Post by Nwbrewer »

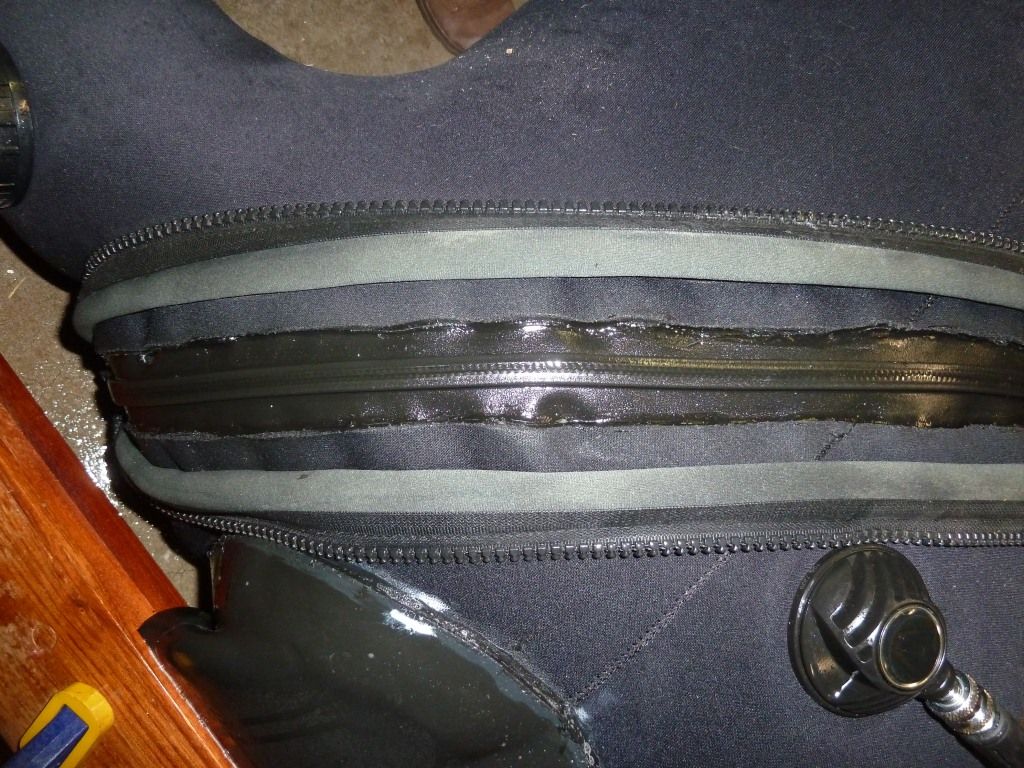
After almost 300 dives the zipper on my Diving Concepts suit finally gave out in the shoulder area, making for a very wet, cold dive. Turns out it’s hard to maintain buoyancy when your suit is auto venting too.


http://vimeo.com/57312397

I know enough people who had the same zipper failure mode that I had an idea it was coming, so I was prepared. A while back Paulicarp located some Tizip zippers in Ebay for $75, so we each bought one. The HOPE is that the more flexible plastic zippers will do better in the “over the shoulder” area than the traditional metal zippers have been. The zippers we got are actually the “Super seal” version, not the “Master seal” version that is used by Santi and others on their suits. It’s a little more robust, but also not as flexible. Time will tell if this was a good call. More info on Tizip at their site - http://www.tizip.com/

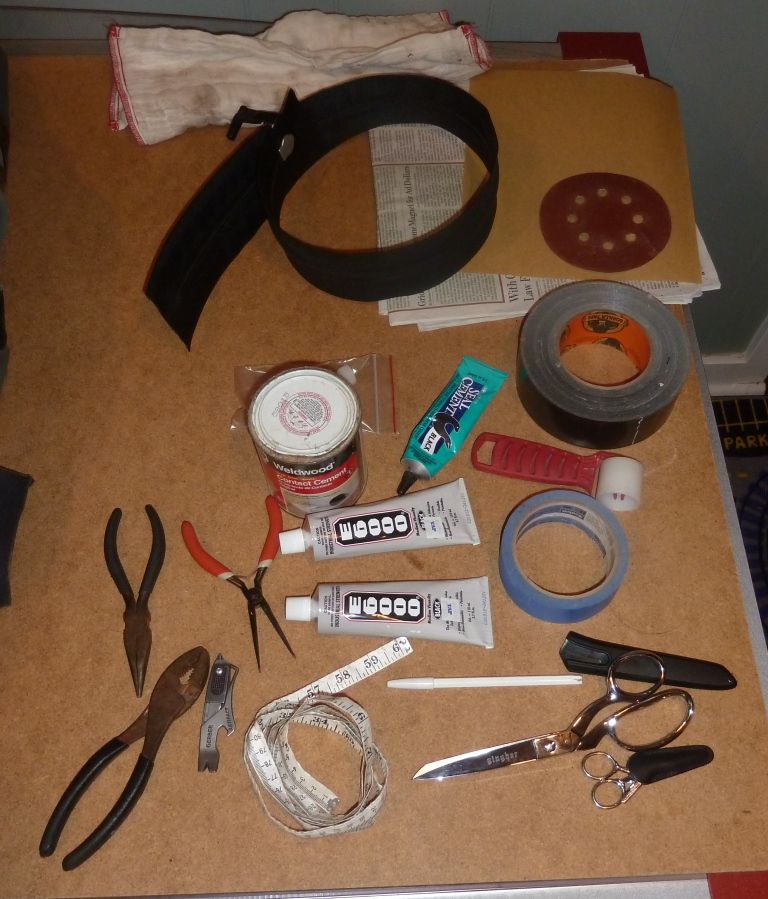
The first step in any project like this is assembling the correct tools.
Image

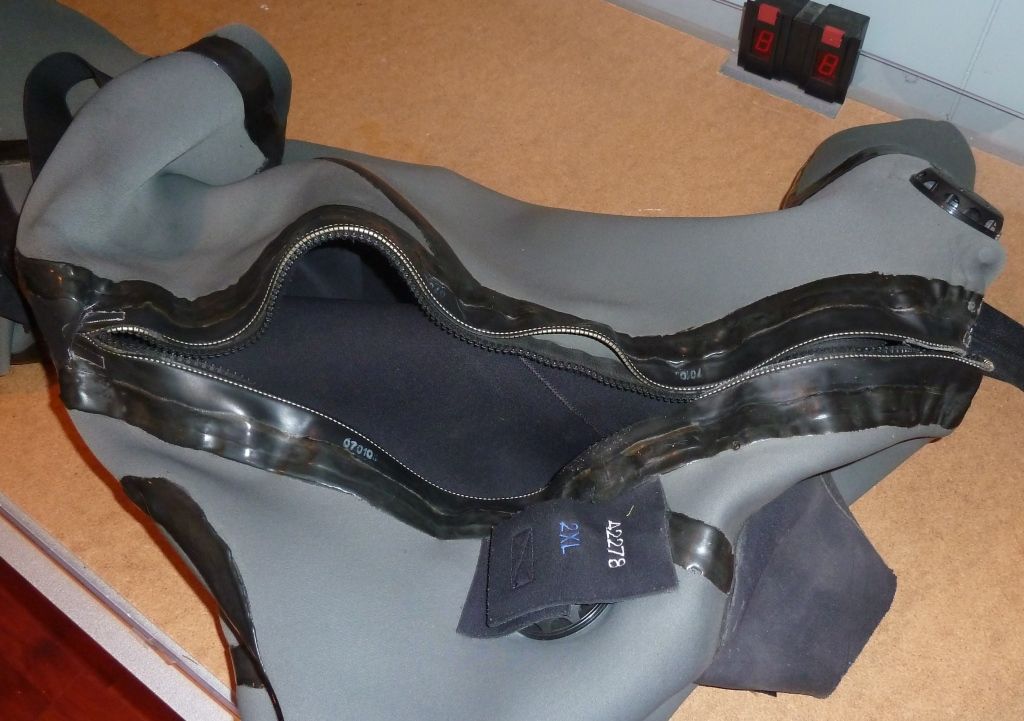
Next, unzip the zipper, and turn the suit inside-out, as it’s easier to work this way.
Image

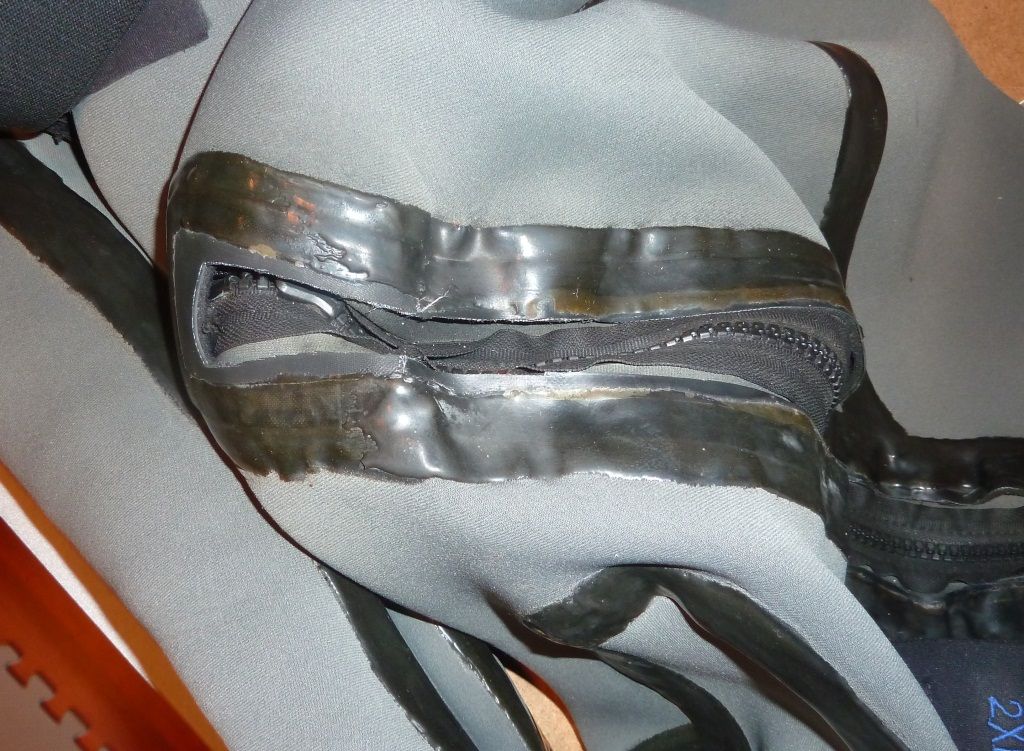
Cut the old zipper out of the suit using a razor blade and a set of sewing scissors. I chose to cut it back to the neoprene, leaving some of the old zipper still on the suit.
Image

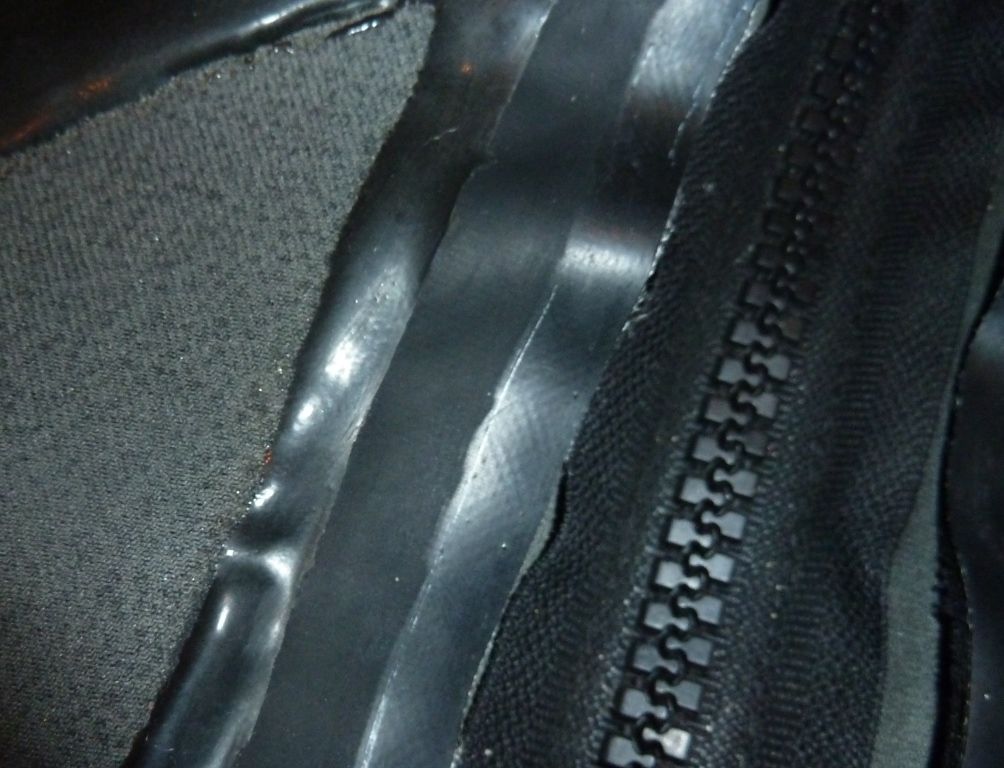
Some of the old sealant was beginning to peel, so I used some pliers and a razor blade, I removed the sealant off the old zipper. Looks much better for sticking the new zipper down. This was actually the most tedious part.
Image

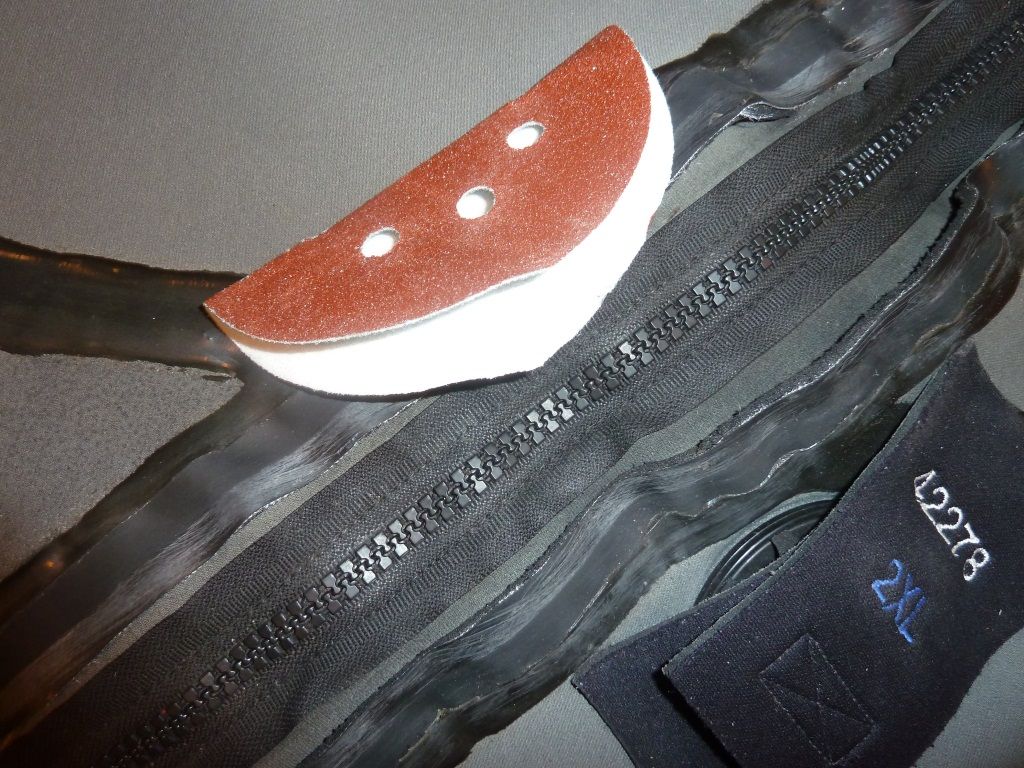
Use some coarse sand paper to rough up the old zipper to get the glue to stick better.
Image

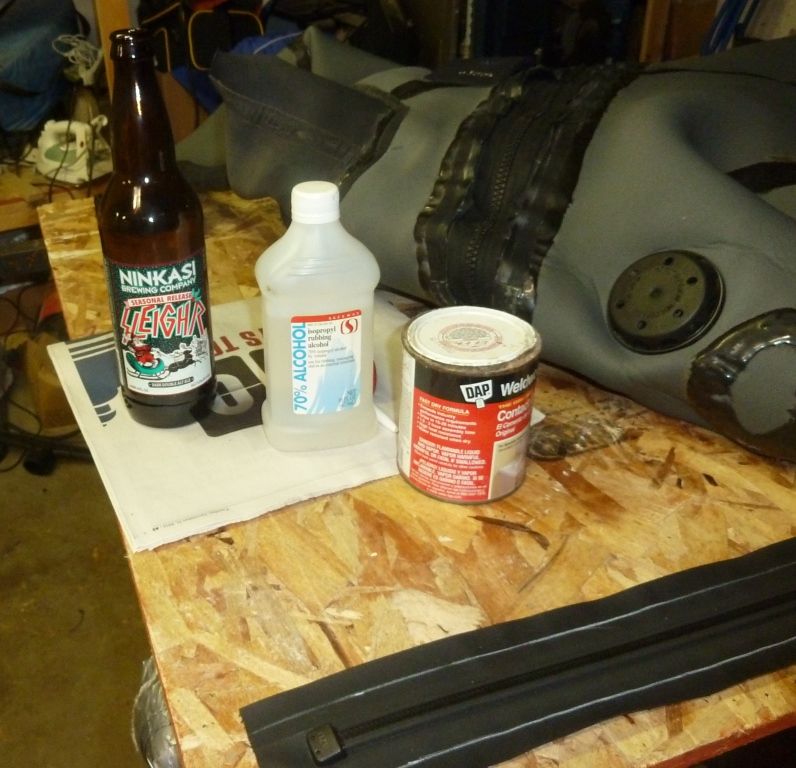
At this point I recommend moving to a well ventilated location, suit glue can be rather smelly. Use some Isopropyl alcohol to wipe down both surfaces. I used DAP contact cement, but if you want to get all fancy there are lots of Drysuit specific contact adhesives you can use. The beer is optional, but it’s good for while you’re waiting for the glue to dry.
Image

No picture of this, but it’s a good idea to measure the old zipper hole, and the new zipper to make sure the it will fit correctly. I had to cut back the neoprene a little to get a good fit.

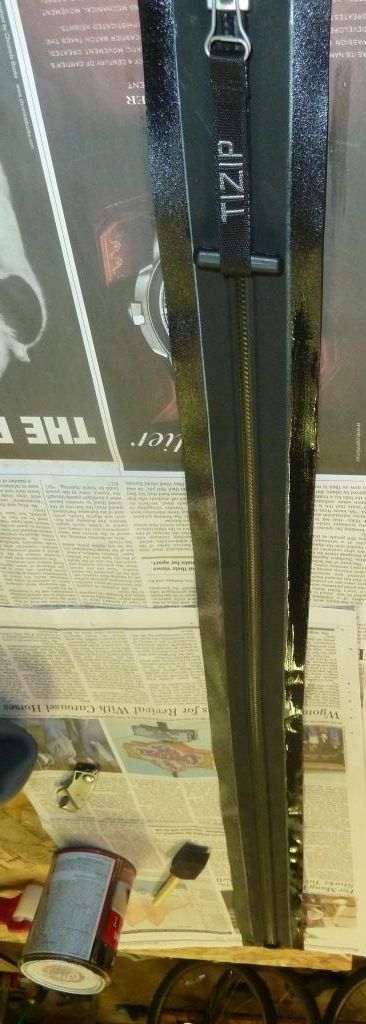
Use a foam brush to apply the adhesive to the suit and zipper as recommended on the can. I added chalk likes to indicate where the glue should go.
Image

I cut some 2” or so strips from a heavy duty garbage bag and applied them to the dry glue on the suit side. It should lightly adhere, and be easy to peel off.
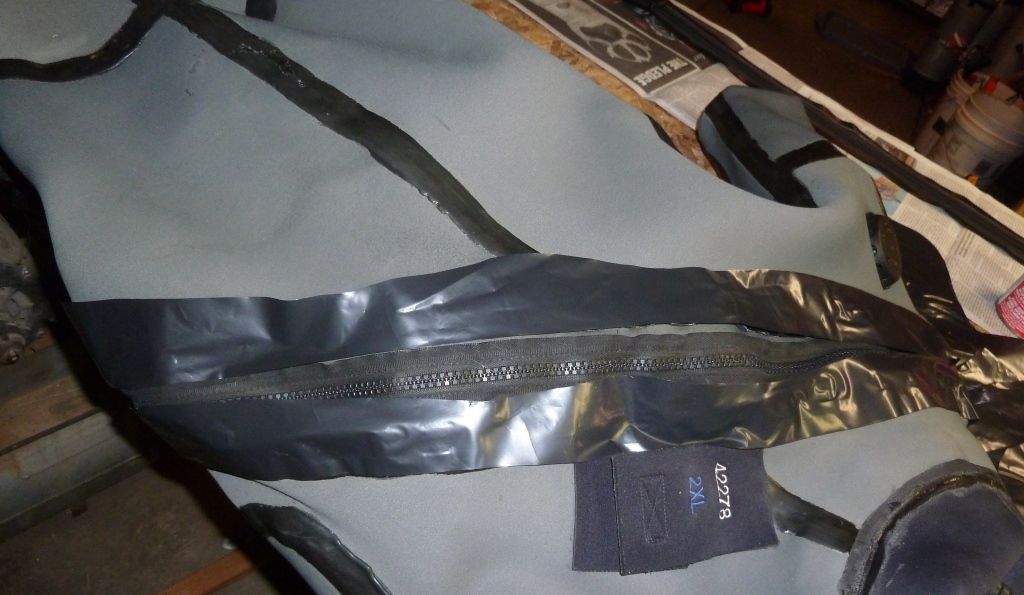
Image

Lay the zipper where it’s going to go, and press the lower end down, and start working up one side of the zipper, peeling the plastic out and sticking the zipper down 3-4” at a time. When you reach the end, do the same to the other side.
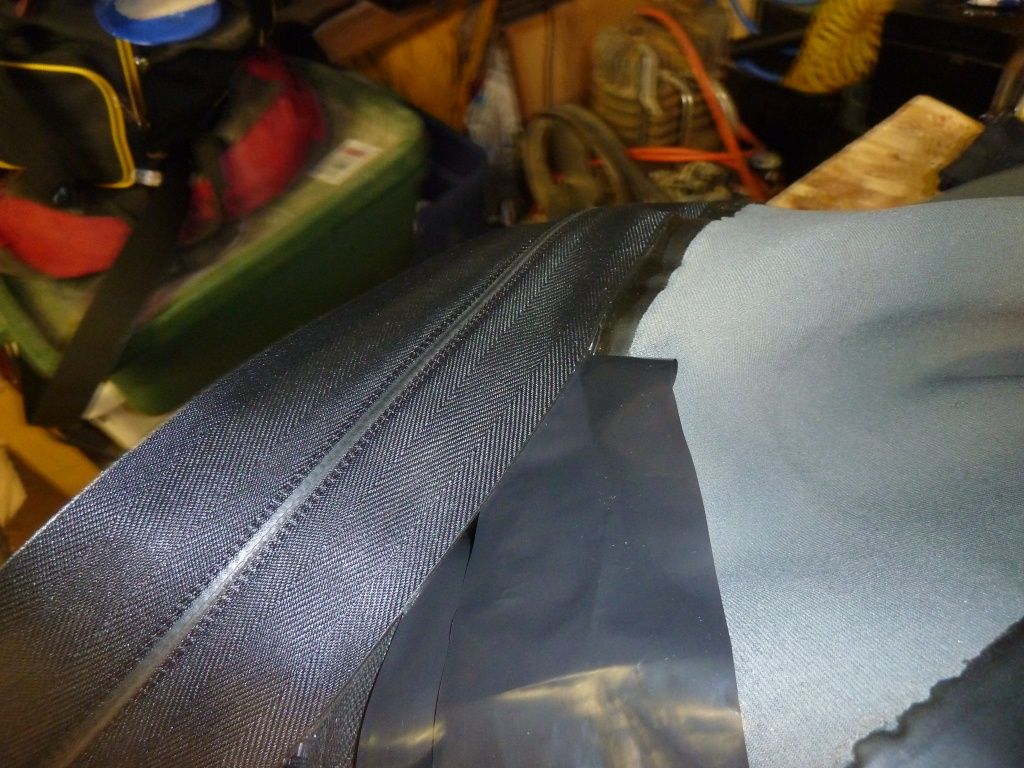
Image

When the zipper is completely adhered, go over the whole thing with a plastic roller. Not to bad looking huh?
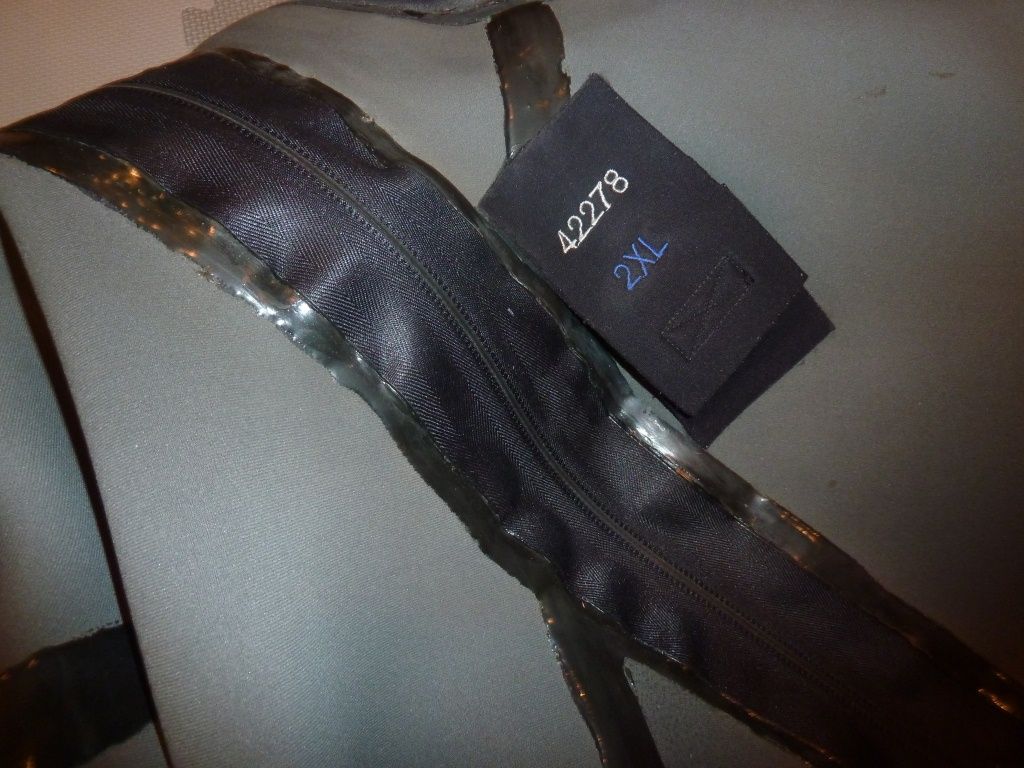
Image

Next I used an applicator tip on a tube of black E-6000 to put a fine bead along the edge of the zipper. I then used my finger to really work it into the fabric.
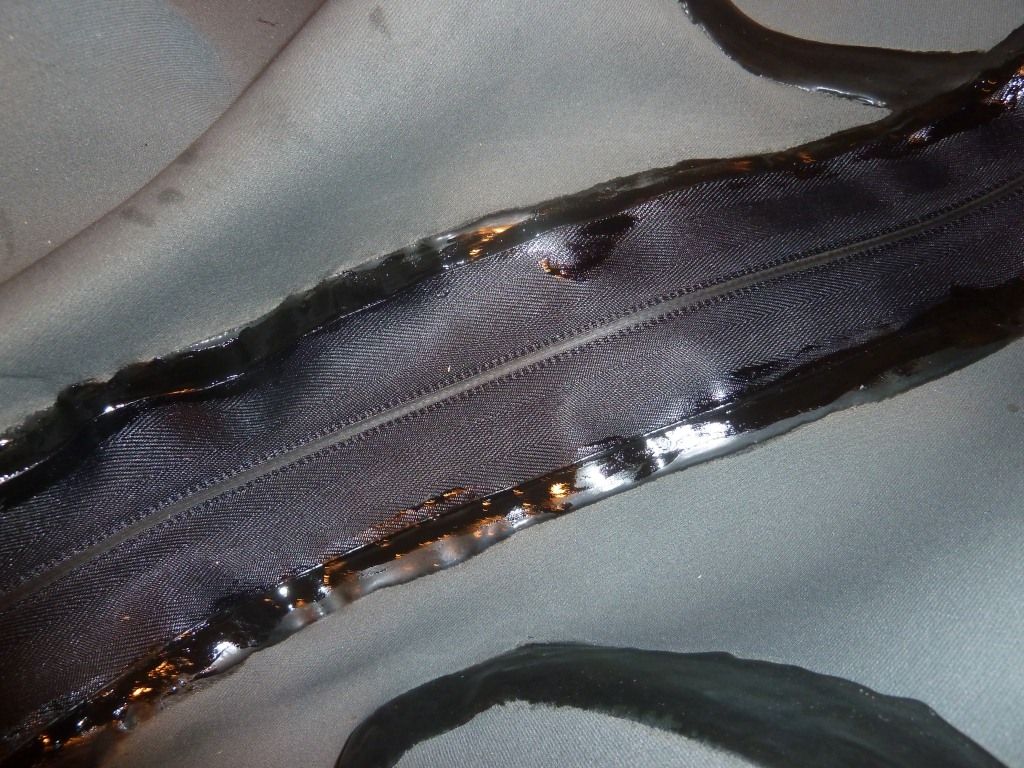
Image

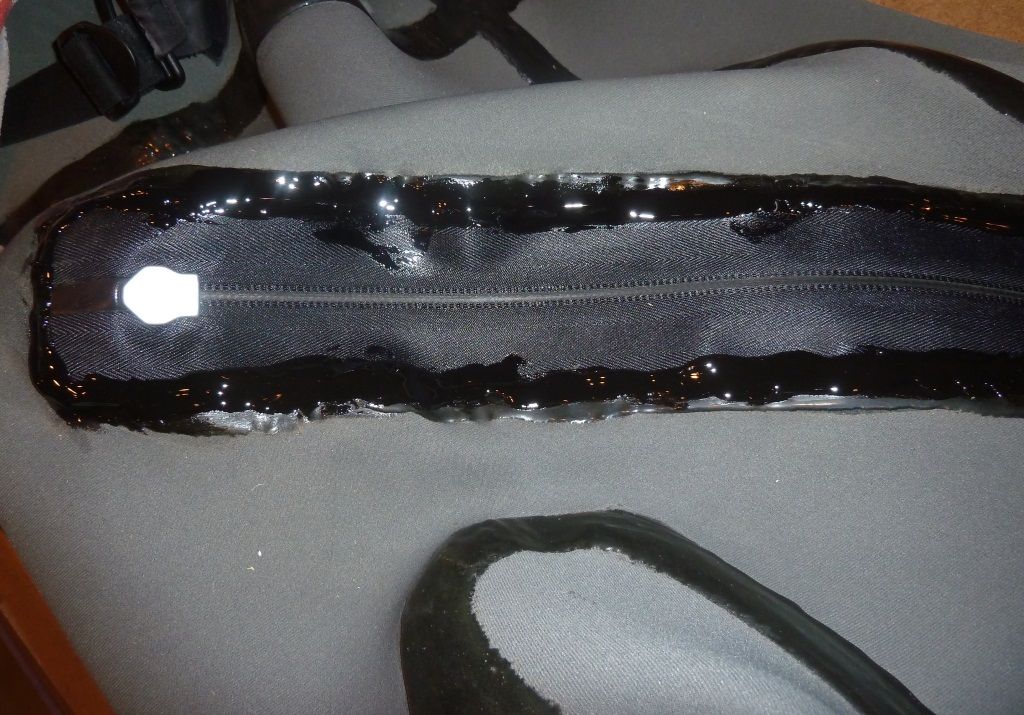
When that was dry, I applied a really heavy bead of E-6000, covering the outer edges of the zipper to seal it up. Came out a little ugly, but not too bad since it’s on the inside of the suit.
Image

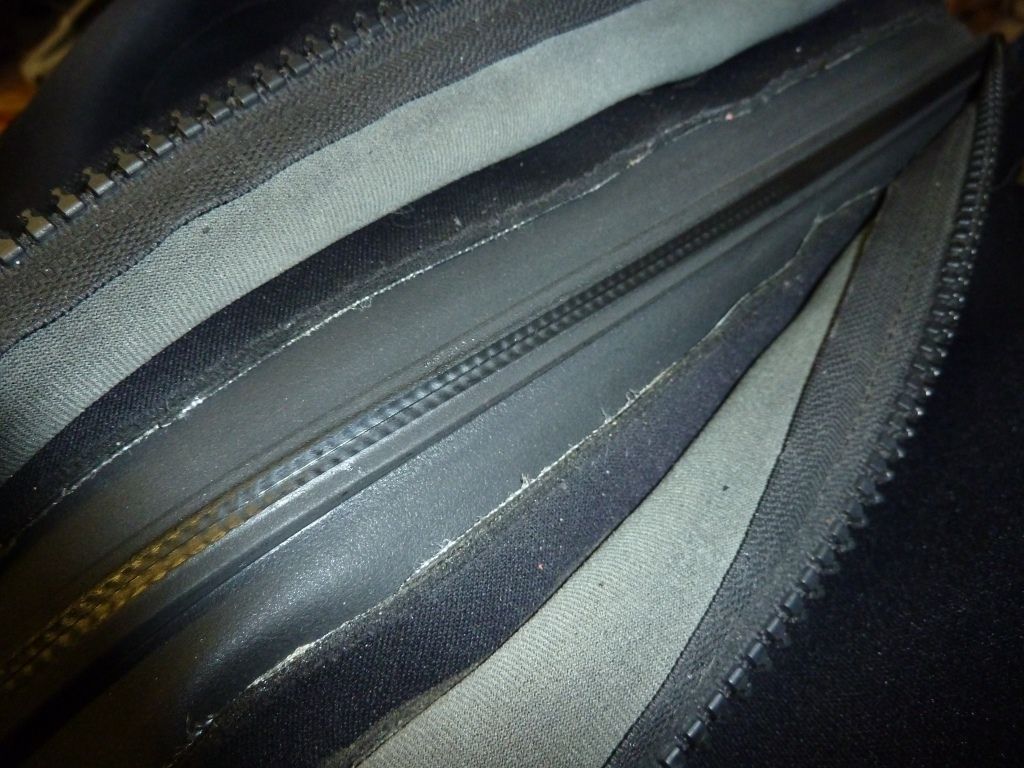
At this point turn the suit back right-side-out. Looks pretty good from this side!
Image

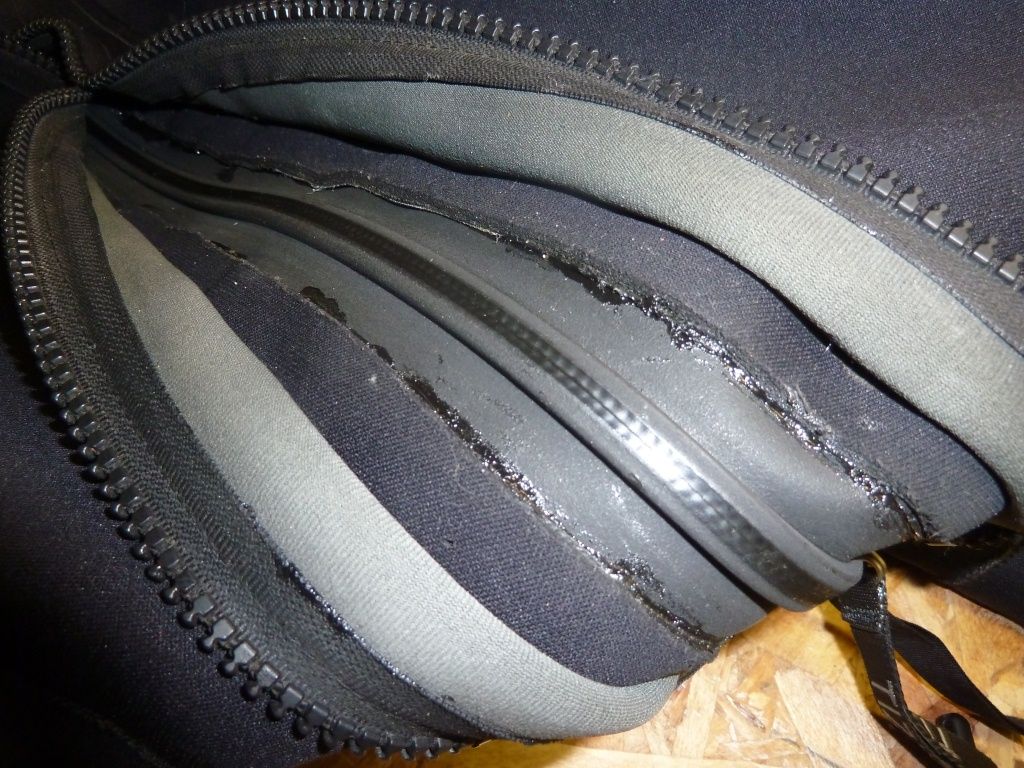
I really should have stopped at this point, but the but I decided on overkill, and used another applicator tip to put a small bead of E-6000 on the edge where the neoprene meets the zipper. If I was doing it again I’d skip this since it look a little ugly and isn’t really needed.
Image

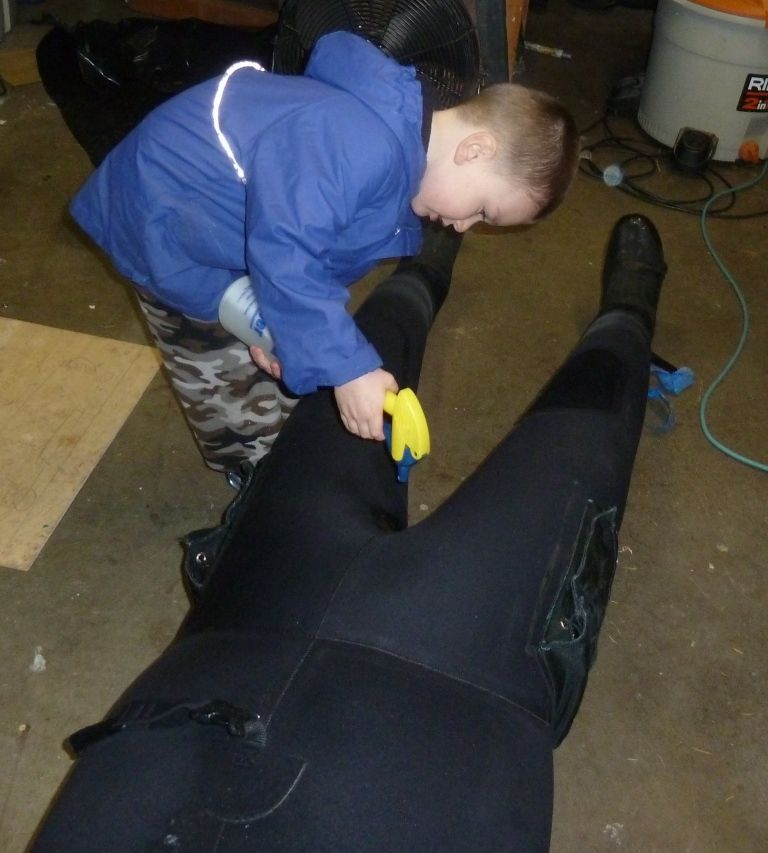
Leak testing at this stage is a really good idea. Inflate the suit, and spray with soapy water to look for bubbles. As with all my projects, I had some help.
Image

Yay for no bubbles!
Image

*****BE SURE TO APPLY SILICONE GREASE TO YOUR ZIPPER BEFORE USE!!! ESPECIALLY AT THE BOTTOM END*****
All in all, it’s not that big of a DIY project, though parts of it are a little tedious. All in all I spent under $90 on the zipper install, so a few hours of my time was worth it. In the interest of full transparency, I **DID** leak on the first dive, I wasn’t as careful applying the adhesive to the lower end of the aipperr as I should have been, and it didn’t adhere well. I think the pressure from my waist strap on my BC popped it loose. I peeled back about 3”, cleaned everything well, and re-glued it. It’s now nice and dry!


:police: :police: :police: :police: :police:
EDIT/Update - Be VERY sure to clean the new zipper AND the old zipper with MEK after a rough sanding of BOTH sides. Otherwise the glue won't hold to the new zipper. Then you get wet. :angry:
Additional tips -
1)Make sure the glue is really dry before you attempt to stick them together.

2) For any spots that were too dry and won't stick, hit it quickly with a heat gun and press it together.

:police: :police: :police: :police: :police:
Last edited by Nwbrewer on Fri Apr 26, 2013 3:43 pm, edited 1 time in total.
"Screw "annual" service,... I get them serviced when they break." - CaptnJack (paraphrased)


"you do realize you're supposed to mix the :koolaid: with water and drink it, not snort the powder directly from the packet, right? :smt064 " - Spatman
User avatar
Dusty2
I've Got Gills
Posts: 6388
Joined: Wed Mar 21, 2007 9:04 pm

Re: DIY thread

Post by Dusty2 »

Damn! Wish you had posted this before I did mine! Would have made for allot easier job and drier too! Nice work. I am sure you will get lots of thanks for a job well done.

And yes, It's allot further back to shore with a flooded suit!
User avatar
spatman
I've Got Gills
Posts: 10881
Joined: Wed May 30, 2007 7:06 am

Re: DIY thread

Post by spatman »

Great write up, Jake! I bookmarked your post to have handy when my zipper finally goes.
Image
User avatar
Dusty2
I've Got Gills
Posts: 6388
Joined: Wed Mar 21, 2007 9:04 pm

Re: DIY thread

Post by Dusty2 »

spatman wrote:Great write up, Jake! I bookmarked your post to have handy when my zipper finally goes.
+1 on that! P.S. that trash bag idea is shear genius. Would have made my efforts so much easier!
User avatar
Nwbrewer
I've Got Gills
Posts: 4624
Joined: Fri Jul 21, 2006 10:59 am

Re: DIY thread

Post by Nwbrewer »

Dusty2 wrote:
spatman wrote:Great write up, Jake! I bookmarked your post to have handy when my zipper finally goes.
+1 on that! P.S. that trash bag idea is shear genius. Would have made my efforts so much easier!
Dusty I just got the dry dive in last night, I didn't want to post until I was at least reasonably sure it worked! I can't take credit for the plastic bag trick, I saw it on a Neck seal thread on ScubaBoard years ago. (It works really good for putting on neckseals too.)

The Master seal version that is more flexible is now available on ebay and also through DRIS if anybody is looking for a zipper. Not too expensive compared to a new metal one either.
"Screw "annual" service,... I get them serviced when they break." - CaptnJack (paraphrased)


"you do realize you're supposed to mix the :koolaid: with water and drink it, not snort the powder directly from the packet, right? :smt064 " - Spatman
User avatar
Nwbrewer
I've Got Gills
Posts: 4624
Joined: Fri Jul 21, 2006 10:59 am

Re: DIY thread

Post by Nwbrewer »

Cleaning the garage today and I found 2 32in zippers that I forgot I had. Anybody interested in a DIY zipper replacement let me know and I'll make you a good deal on a zipper.
"Screw "annual" service,... I get them serviced when they break." - CaptnJack (paraphrased)


"you do realize you're supposed to mix the :koolaid: with water and drink it, not snort the powder directly from the packet, right? :smt064 " - Spatman
User avatar
Dusty2
I've Got Gills
Posts: 6388
Joined: Wed Mar 21, 2007 9:04 pm

Re: DIY thread

Post by Dusty2 »

Been noodling around trying to come up with a movie light setup without paying a fortune and here are my latest and greatest. First pix are of a setup I have made using 2 Trust fire dive lights Around 40 bucks if you order from China. I removed the silly crown they put on the end and fabricated a diffuser and made up an adapter to mount it on a standard light arm. Looks pretty cool and works reasonably good and not very expensive. The second one uses my basic Dusty's light but I found a diffused reflector out of an old video light and modified the light head to fit the new reflector and used a T-6 led and drive fitted to the reflector. It produces a wide 90 deg light with no hotspot and very clean edges. Looks great and works great too.
IMG_9843.JPG
IMG_9840.JPG
IMG_9838.JPG
9847wsm.JPG
User avatar
thefeve
Compulsive Diver
Posts: 361
Joined: Mon Jun 25, 2012 7:24 am

Re: DIY thread

Post by thefeve »

I like! If i ordered a pair of the trust fire lights, how much would you want to make a few of the diffusers?
I think you've figured out the root cause of your problems. Even sea lions get annoyed by splitfin divers silting out their dive sites. Switch back to your jets and you'll be safe from the sea lion silt prevention patrol from now on. - NWbrewer
User avatar
Dusty2
I've Got Gills
Posts: 6388
Joined: Wed Mar 21, 2007 9:04 pm

Re: DIY thread

Post by Dusty2 »

Would depend on how much you wanted done. If all your looking for is the diffusers it wouldn't be all that much.
User avatar
thefeve
Compulsive Diver
Posts: 361
Joined: Mon Jun 25, 2012 7:24 am

Re: DIY thread

Post by thefeve »

Could you send me the link of the lights you used?

That would be awesome...
I think you've figured out the root cause of your problems. Even sea lions get annoyed by splitfin divers silting out their dive sites. Switch back to your jets and you'll be safe from the sea lion silt prevention patrol from now on. - NWbrewer
User avatar
Dusty2
I've Got Gills
Posts: 6388
Joined: Wed Mar 21, 2007 9:04 pm

Re: DIY thread

Post by Dusty2 »

thefeve wrote:Could you send me the link of the lights you used?

That would be awesome...
There are several listings on ebay but this guy ships very quickly and has been dependable. It is a powerful light for backup too but the beam is very tight.

http://www.ebay.com/itm/180834967467?ss ... 1439.l2649
User avatar
BASSMAN
I've Got Gills
Posts: 5808
Joined: Thu Jan 05, 2006 2:55 am

Re: DIY thread

Post by BASSMAN »

Nwbrewer wrote:Cleaning the garage today and I found 2 32in zippers that I forgot I had. Anybody interested in a DIY zipper replacement let me know and I'll make you a good deal on a zipper.
I'm interested in a Zipper, need to measure mine, I'll let you know.
Hi, my name is Keith, and I'm a Dive Addict! :supz:
User avatar
Dusty2
I've Got Gills
Posts: 6388
Joined: Wed Mar 21, 2007 9:04 pm

Re: DIY thread

Post by Dusty2 »

How about my new movie light. (not for sale)

My prototype of the smaller Dusty's light I chose not to market was just sittin there looking sad so I decided it looked like a candidate for some experimentation. You know what they say about idle minds! :nutty:
0146net.JPG
User avatar
fmerkel
I've Got Gills
Posts: 1037
Joined: Mon Jan 12, 2009 6:45 pm

Re: DIY thread

Post by fmerkel »

Interesting way to 'sling' it.

Fritz
To Air is Human,
To Respire, Divine.
User avatar
Nwbrewer
I've Got Gills
Posts: 4624
Joined: Fri Jul 21, 2006 10:59 am

Re: DIY thread

Post by Nwbrewer »

Update from Sept 2010 -

The neck seal from my original post finally bit the dust. http://www.nwdiveclub.com/viewtopic.php ... 33#p160833

I made a new one using the same template, only out of 2mm neoprene the same as renoun did.

Much more pliable, nice and comfortable on the neck, and seems to seal a bit better as it molds better to your neck.

I updated the original post as well.

Jake
"Screw "annual" service,... I get them serviced when they break." - CaptnJack (paraphrased)


"you do realize you're supposed to mix the :koolaid: with water and drink it, not snort the powder directly from the packet, right? :smt064 " - Spatman
User avatar
BASSMAN
I've Got Gills
Posts: 5808
Joined: Thu Jan 05, 2006 2:55 am

Re: TIZIP!

Post by BASSMAN »

Nwbrewer wrote: More info on Tizip at their site - http://www.tizip.com/
The entire website is in German! Where can I buy a TIZIP 36" ?
Hi, my name is Keith, and I'm a Dive Addict! :supz:
User avatar
mpenders
Submariner
Posts: 568
Joined: Tue Jun 30, 2009 10:59 am

Re: TIZIP!

Post by mpenders »

BASSMAN wrote:
Nwbrewer wrote: More info on Tizip at their site - http://www.tizip.com/
The entire website is in German! Where can I buy a TIZIP 36" ?
http://www.diverightinscuba.com/catalog ... -3397.html
User avatar
Nwbrewer
I've Got Gills
Posts: 4624
Joined: Fri Jul 21, 2006 10:59 am

Re: TIZIP!

Post by Nwbrewer »

BASSMAN wrote:
Nwbrewer wrote: More info on Tizip at their site - http://www.tizip.com/
The entire website is in German! Where can I buy a TIZIP 36" ?
Click the union jack flag in the upper right to get english.
"Screw "annual" service,... I get them serviced when they break." - CaptnJack (paraphrased)


"you do realize you're supposed to mix the :koolaid: with water and drink it, not snort the powder directly from the packet, right? :smt064 " - Spatman
User avatar
Joshua Smith
I've Got Gills
Posts: 10250
Joined: Mon Apr 03, 2006 9:32 pm

Re: DIY thread

Post by Joshua Smith »

Nwbrewer wrote:
BASSMAN wrote:
Nwbrewer wrote: More info on Tizip at their site - http://www.tizip.com/
The entire website is in German! Where can I buy a TIZIP 36" ?
Click the union jack flag in the upper right to get english.
Heh.
Maritime Documentation Society

"To venture into the terrible loneliness, one must have something greater than greed. Love. One needs love for life, for intrigue, for mystery."
User avatar
Mateo1147
Extreme Diving Machine
Posts: 498
Joined: Fri Jan 14, 2011 9:37 pm

Re: DIY thread

Post by Mateo1147 »

Joshua Smith wrote:
Nwbrewer wrote:
BASSMAN wrote:
Nwbrewer wrote: More info on Tizip at their site - http://www.tizip.com/
The entire website is in German! Where can I buy a TIZIP 36" ?
Click the union jack flag in the upper right to get english.
Heh.
Is it the queens english?
You breath like a girl! -Blaiz
I thought she was right until I dove with eliseaboo!
User avatar
GMan
Frequent Bubbler
Posts: 31
Joined: Mon Aug 25, 2008 7:24 am

GoPro

Post by GMan »

Did you keep the box your GoPro came in? It turns out this can be used as a scooter mount.
goprobox.jpg
goprobox.jpg (36.49 KiB) Viewed 4830 times
I trimmed out most of the plastic, leaving two tabs on each end.
IMG_7360.JPG
Then bent the tabs with a heat gun to roughly match the curvature wanted (~7 1/4 diameter or so)
IMG_7368.JPG
Dremel'd two slot to pass through a steel clamp. Despite my best efforts, all fingers remain attached...
IMG_7370.JPG
Clamped on the nose of the scooter, along with 2" webbing to use as a handle, et voila
IMG_7373.JPG
IMG_7374.JPG
The camera can be pivoted around 180 degs for underwater selfies.
IMG_7376.JPG
The weight of the scooter help stabilize the shots quite nicely. Credits to Mark and Jeff for the ideas.
Post Reply